

How To Generate Ssl Certificate In Windows 10
When y'all are working in a localized environs, you might demand a self-signed SSL certificate installed on your arrangement. The self-signed SSL document is a certificate issued to yourself by you and it is trusted across your organisation. Y'all can generate the certificate for the current user or for all the users presented on the organization. The cocky-signed SSL certificate will only exist trusted across your system or the localized environment and it may not be trusted elsewhere. In this article, we will see the steps to generate cocky-signed SSL document in Windows 10/Server.
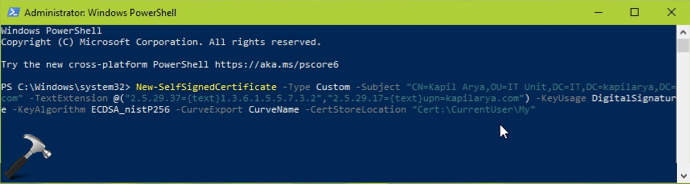
To create a self-signed SSL certificate, y'all tin can utilize Windows PowerShell. For this, we will apply New-SelfSignedCertificate PowerShell cmdlet. The full general syntax we will use to generate self-signed SSL certificate is as follows:
New-SelfSignedCertificate -Blazon Custom -Subject "CN=Kapil Arya,OU=Information technology Unit,DC=www,DC=kapilarya,DC=com" -TextExtension @("2.5.29.37={text}one.3.6.one.5.5.vii.3.two","ii.v.29.17={text}upn=*.kapilarya.com") -KeyUsage DigitalSignature -KeyAlgorithm ECDSA_nistP256 -CurveExport CurveName -CertStoreLocation "Cert:\CurrentUser\My" Hither is the description of parameters used in to a higher place code. You tin customize them every bit per your requirement:
| Parameters | Usage | Possible values (values used in our document are mentioned in bold) |
|---|---|---|
| Type | This parameter defines the type of document generated. |
|
| Subject | It is the most important part of the code. It defines the identity to which the certificate is beingness issued. | Information technology tin can contain mutual name (CN), organizational unit of measurement (OU) and domain controller (DC) values. Note that this does not take wildcard values. |
| TextExtension | Defines the object identifier, followed by certificate usage, policies, constraints, mappings and subject culling proper noun (SAN). | Possible values of object identifier:
In this certificate, we are using Enhanced Key Usage. 2.5.29.37. You can utilize post-obit values with it depending upon purpose of the certificate:
We also used SAN in this certificate. It can have either of these values:
|
| KeyUsage | Information technology specifies the cardinal usage in the key usage extension. |
|
| KeyAlgorithm | Defines the algorithm that is used to create symmetric keys for the new certificate. | If define, nosotros tin can apply Elliptic Curve Digital Signature Algorithms (ECDSA), or RSA algorithm. Notation that y'all tin ECDSA for improve performance and less burden on arrangement. In this code, nosotros're using ECDSA with Secure Hash Algorithm (SHA) 256. If you're using RSA, recommended key size is 2048-bit keys. For RSA, usable format is RSA -KeyLength 2048 |
| CurveExport | If you are using ECDSA, you tin use this to define how the public key parameters for an elliptic curve key are represented in the new certificate. |
|
| CertStoreLocation | Yous can use this parameter to define the location where your generated certificate volition be saved. It can be either saved to personal certificate directory of currently logged in user or to the machine, where information technology can exist bachelor for all the users nowadays on the arrangement. |
|
The to a higher place code generates the certificate valid for one years from the date of generation. To extend the appointment of the certificate, you can bank check the PowerShell cmdlet information. I believe now nosotros have enough information about the Windows PowerShell code to generate the certificate. Let us encounter how to really generate the document and brand information technology trusted across your arrangement.
Generate cocky-signed SSL certificate in Windows 10/Server
1. Open administrative Windows PowerShell.
2. In the PowerShell window, paste the code y'all have customized for your certificate and press the Enter central.
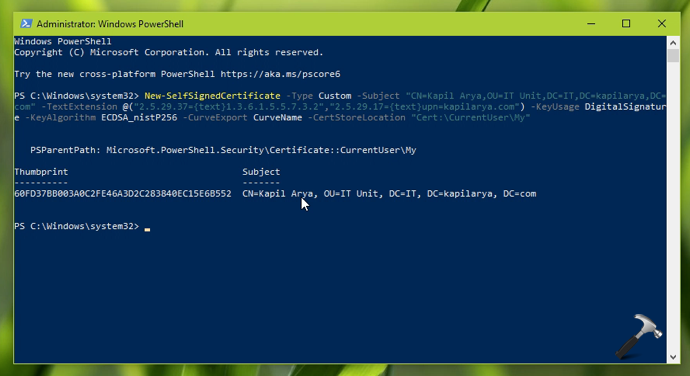
3. In few moments, yous volition see that certificate is generated. Information technology should exist saved to the document location yous have mentioned in the code.
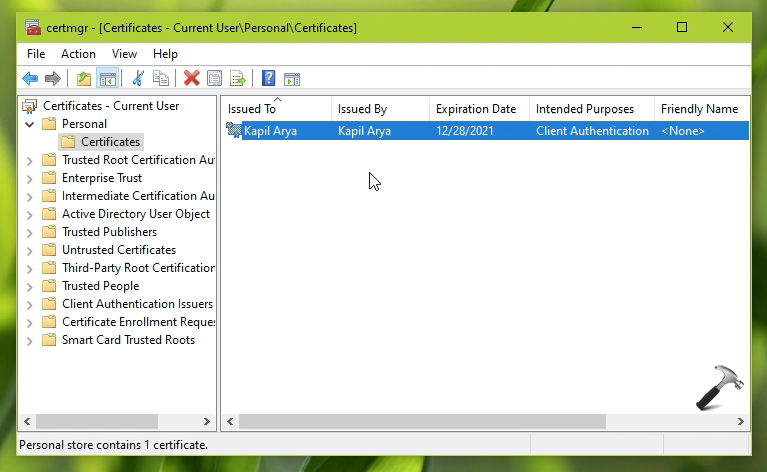
4. Open Certificate Manager (certmgr) by executing certmgr.msc command. Go to Personal > Certificates. You should be at present able to spot your generated cocky-signed SSL certificate.
5. Double click on the certificate to confirm all the details you have entered via parameters. Note that at this phase, the certificate is not valid and it won't be accepted because information technology is not from a trusted root certification dominance. To make it trusted, you need to move or place it into the Trusted Root Certification Authorities store.

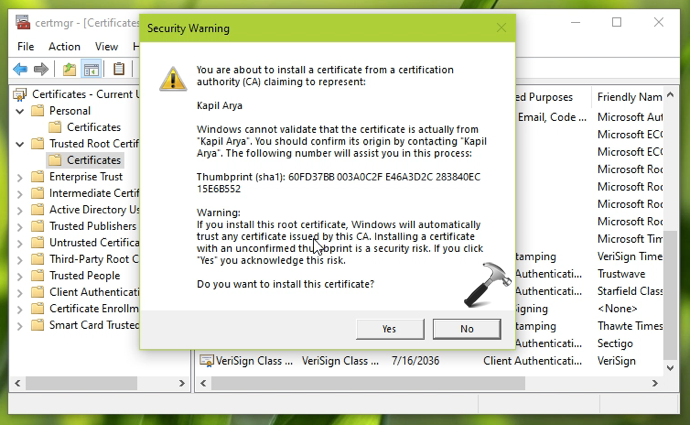
6. So re-create the certificate and paste it to Trusted Root Certification Government > Certificates. There will be a security warning appearing which is obvious. You can select Yes in the alarm, as you're installing your own generated document.
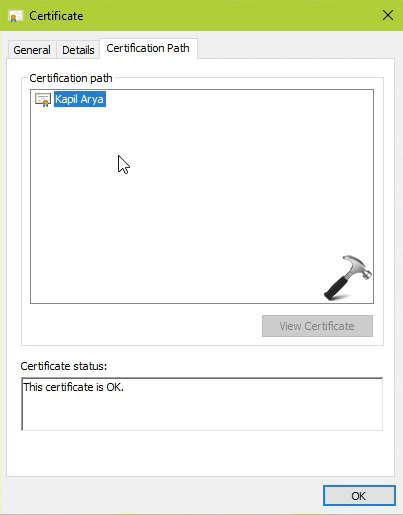
7. At present double click on the certificate self-signed SSL certificate in Trusted Root Certification Authorities store and you'll detect that the certificate is now OK. This ways that your generated certificate is now valid and can be accustomed across the system.
Checkout this video to illustrate this complete guide:
That's it!
Related: How To Install Trusted Root Certificate In Windows 10.
Source: https://www.kapilarya.com/generate-self-signed-ssl-certificate-in-windows-10-server
Posted by: gillmandifuld.blogspot.com
0 Response to "How To Generate Ssl Certificate In Windows 10"
Post a Comment